Interfacing with the button
Button is a mechanical device which establishes contact with either logical high (+vcc, 1) or logical ground (gnd, 0) when clicked, depending on the configuration. This change in voltage applied is measured to determine the state of the button using a GPIO. The button module supplied with Grove makes contact with +vcc when clicked.
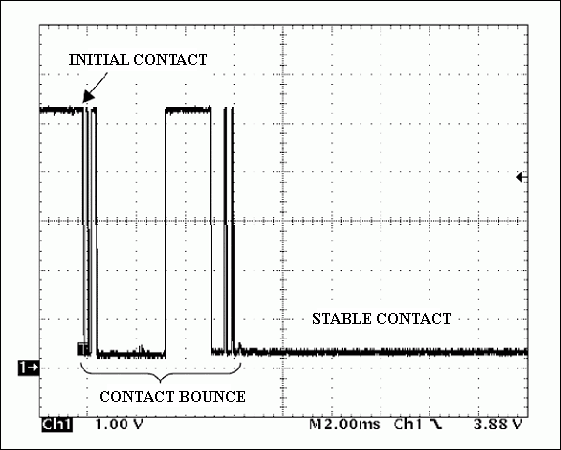
The other aspect to be considered while interfacing with a button is that of "contact bounce". Due to physical properties of a button, when clicked, the metal contacts bounces against each other before settling to the actual intended position. Following image depicts this (image from Maxim):

This is problematic because the program running on Edison/Galileo can read this change and register these varying logic levels as actual button presses but as for the user's perception, the button was clicked only once.
To over come this issue, we use a technique called button denouncing. The simplest form of this technique is to use a delay after a click is detected so as to allow the button to "settle" and then read the button pin to read a stable signal. In this tutorial, this is the technique we will be using.
Hardware connections
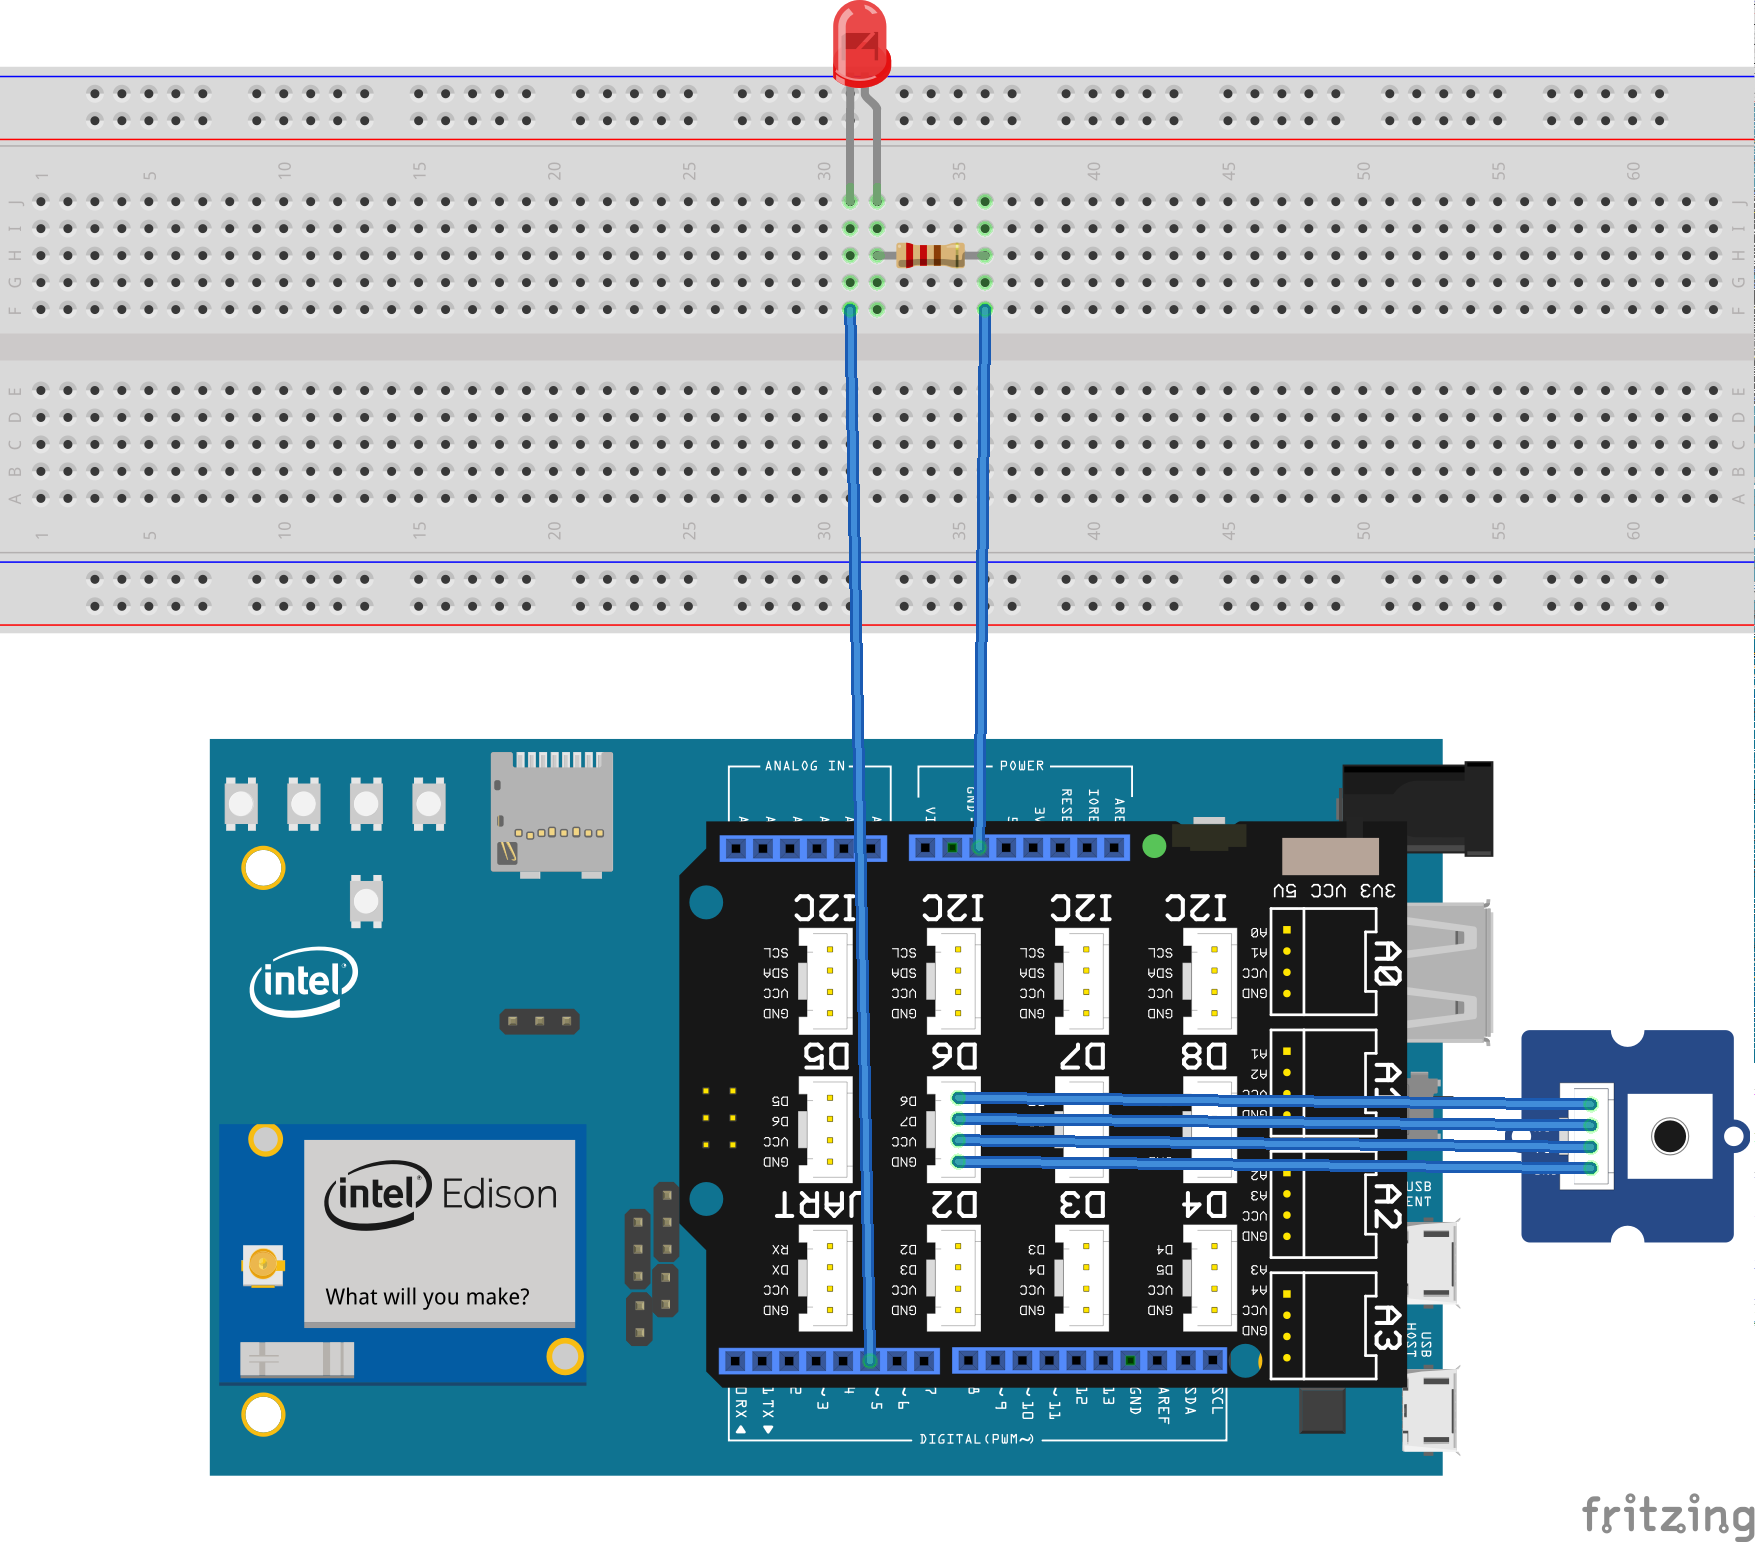
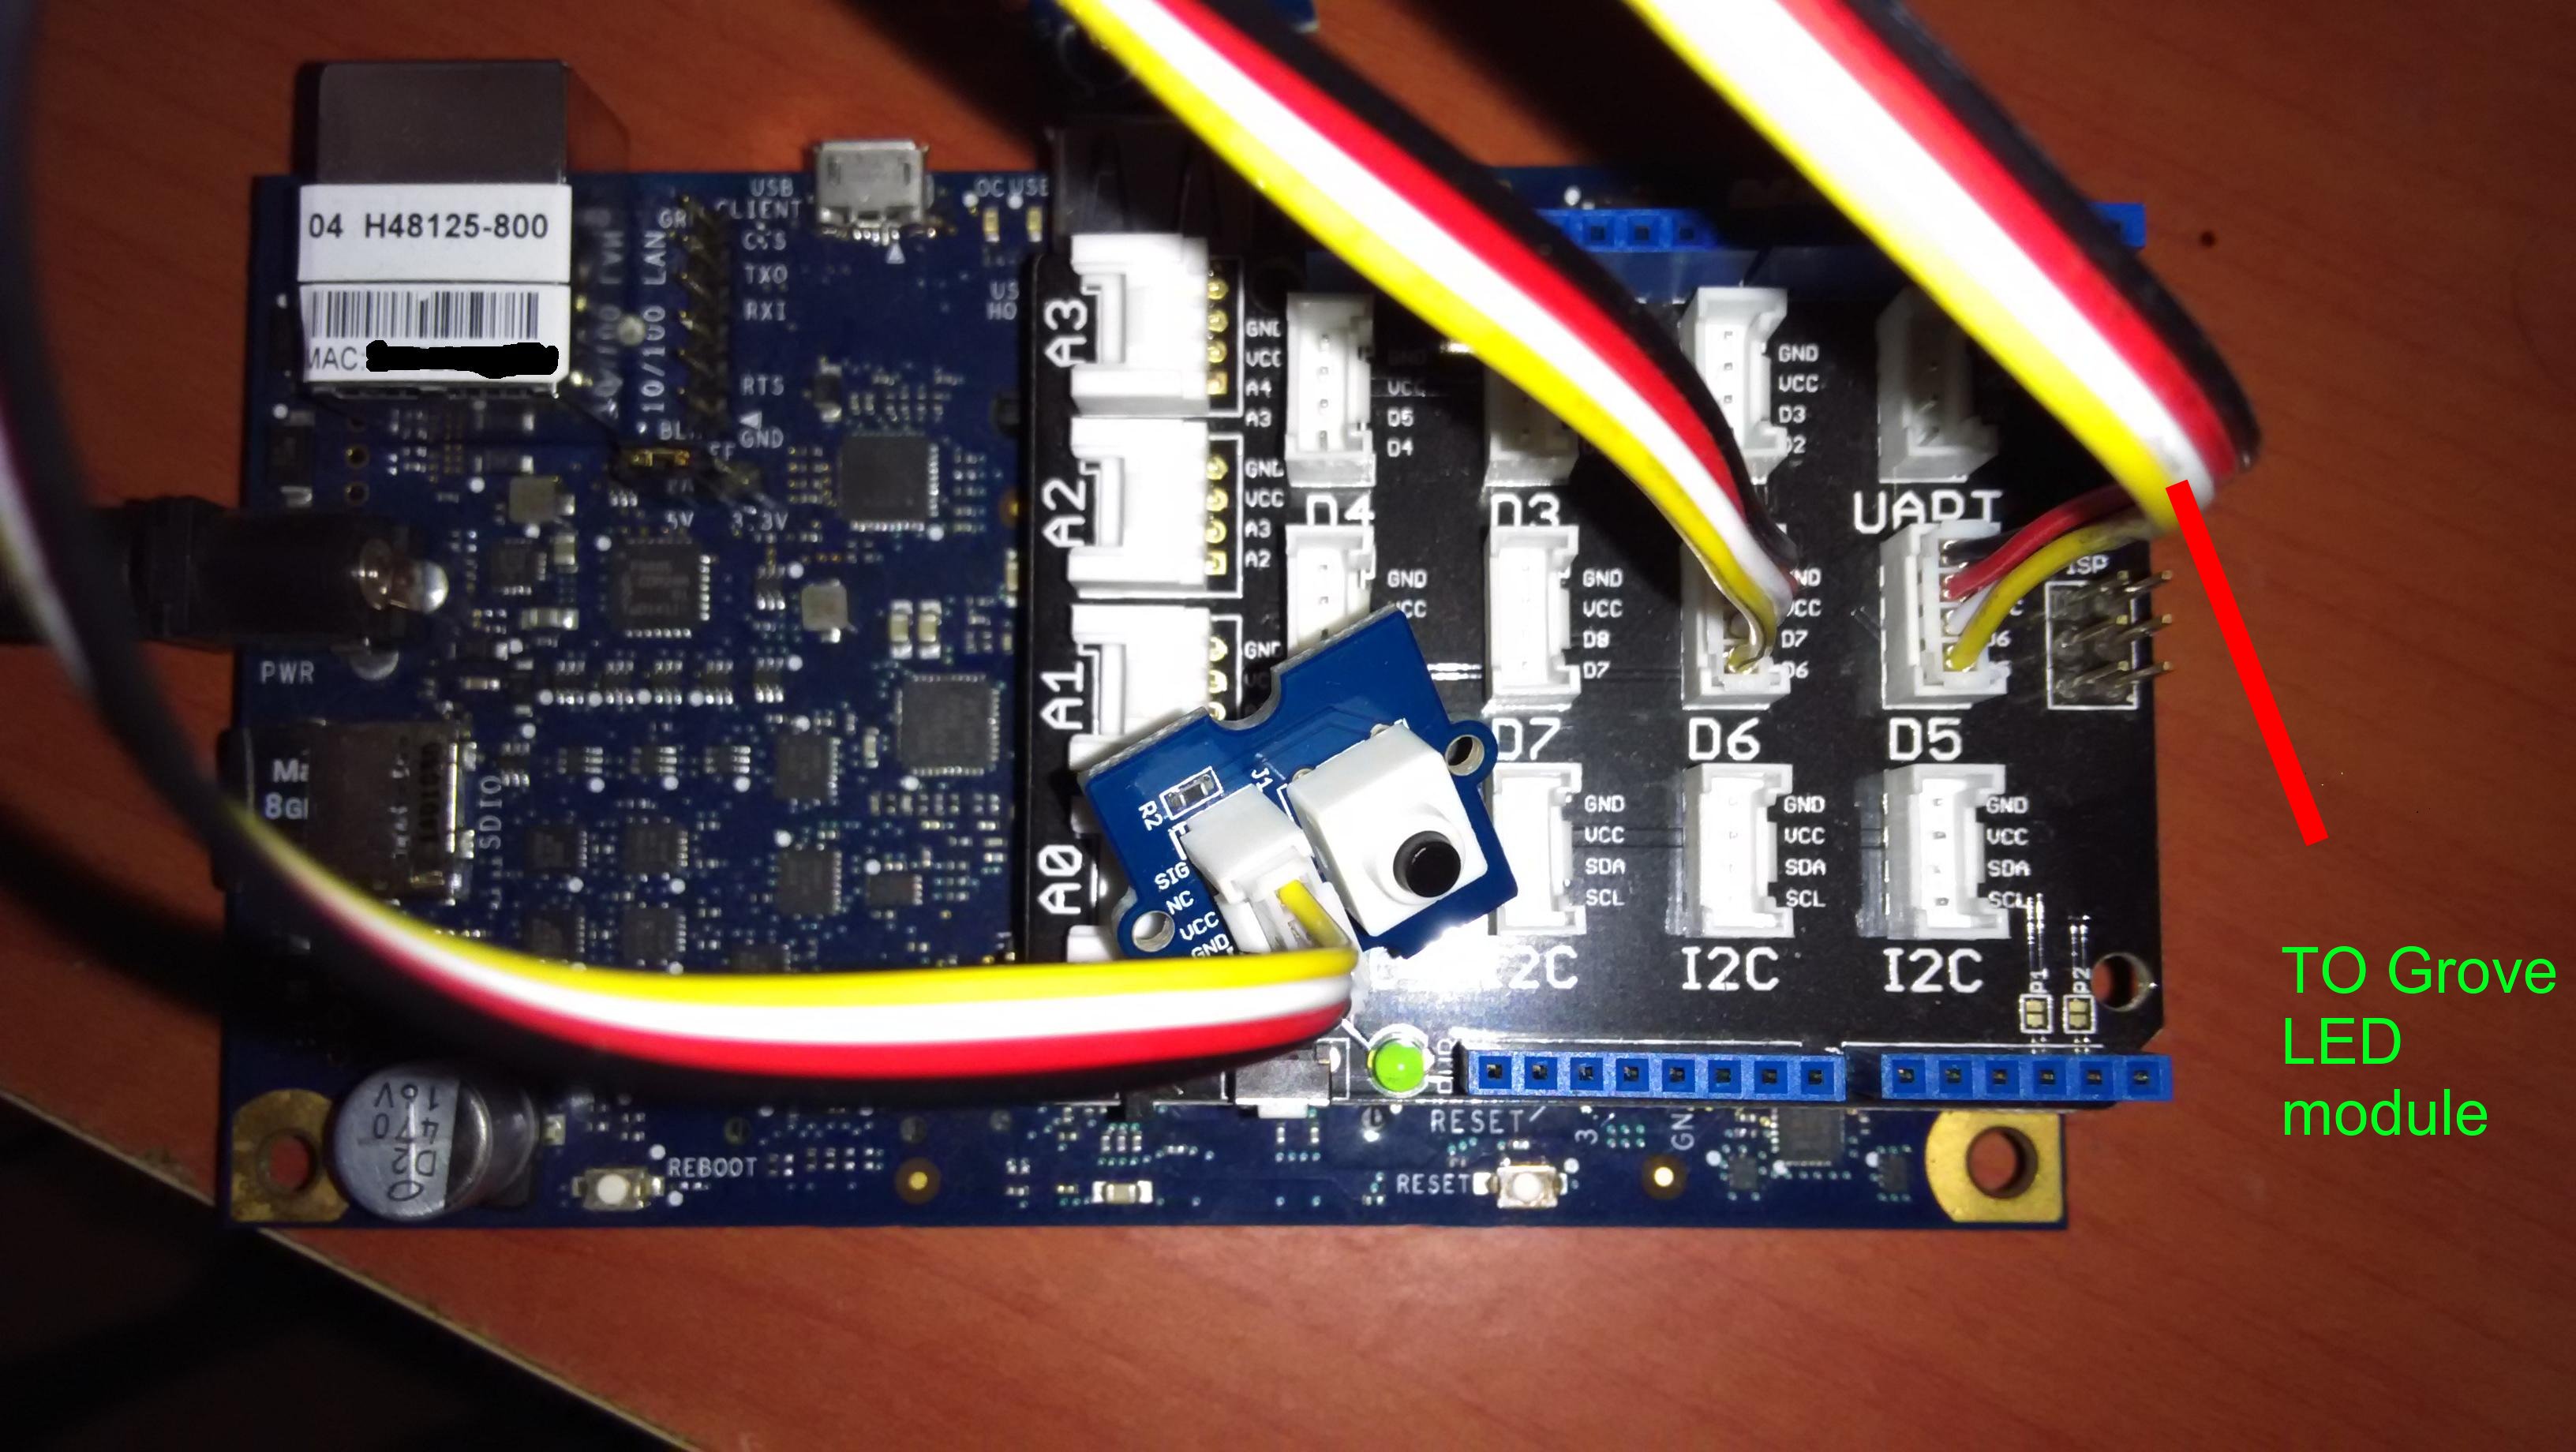
The button is connected to port D6 and the LED is connected to port D5 via a current limiting resistor, if you are not using the Grove LED module.

With Grove LED module:

The code
https://gist.github.com/navin-bhaskar/d5386fa401f47e7eba6c
Just as in the previous tutorial, we create context for GPIO to be used as output for controlling the LED. In addition to that, one more GPIO context is created to be used as input for reading the button status:
ledPin = mraa_gpio_init(LED_PIN);
btnPin = mraa_gpio_init(BTN_PIN);
Next, the LED pin(ledPin) is set as output and button pin (btnPin) is set as input pin
mraa_gpio_dir(ledPin, MRAA_GPIO_OUT);
mraa_gpio_dir(btnPin, MRAA_GPIO_IN);
Then, in a infinite while loop, we wait for button click event
while (mraa_gpio_read(btnPin) != 0)
{ }
The "mraa_gpio_read(pin)" function reads and returns the voltage level at the given "pin", 0 if the voltage applied is ground or 1 if the voltage applied is Vcc.
The execution would flow out of the while loop only when the function "mraa_gpio_read()" returns anything other than 0, implying that the button was clicked.
Once this event is detected, we wait for some time (using usleep) and read the pin again to avoid the contact bouncing phenomenon. Based on the state of the variable "toggle", the LED is turned on or off.
while(1)
    {
      while (mraa_gpio_read(btnPin) != 0)
      { }
       usleep(10);
       if (mraa_gpio_read(btnPin) == 1)
       {
           if (toggle == 0)
           {
               toggle = 1;  /* If the LED is off, trun it on */

           }
           else
           {
               toggle = 0;  /* Turn off the LED */
           }
           mraa_gpio_write(ledPin, toggle);
       }
       // else: false click, ignore it
    }
Fetching and compiling the 'C 'program
Login to your Edison or Galileo
Run the following command to fetch the "C" file from git hub:
wget https://raw.githubusercontent.com/navin-bhaskar/C-CPP-on-Intel-Edison-Galileo/master/part2-button/button.c
Compile and run the application using this command:
gcc -o button button.c -lmraa
./button
Now you should be able to toggle the LED using the switch connected to port D6
To quit the application hit "ctrl+c"
No comments:
Post a Comment